I recently posted on blenderartists.org in response to some questions and misunderstanding about gamma correction and ‘linear workflow’ in 3D rendering.
I thought I’d re-post it here, since there are a lot of misconceptions about this topic around.
Much of the value of a linear workflow comes with rendering colour textures. But as the name suggests, it’s a workflow, that has to be kept in mind throughout the entire process.
The issue is that when you make a texture, either painting it in Photoshop to look good on your screen, or as a JPEG from a camera, that image is made to look good under gamma corrected conditions, usually gamma 2.2. So as you paint that texture, you’re looking at it on a monitor that’s already gamma 2.2, which is not linear. This is all well and good, displays are already gamma corrected to better fit the range of human vision.
The problem starts though, when you use those colour maps as textures in a renderer. When you’re doing lighting calculations in a renderer, those take place in a linear colour space. i.e – add 2x as much light, and it gets 2x brighter. The problem is that your colour textures aren’t like that if they’re at gamma 2.2. What’s double in numerical pixel values in gamma 2.2 is not necessarily twice brighter perceptually. So this breaks the idea of taking brightness information from a colour texture and using it in lighting/shading calculations, especially if you’re doing multiple light bounces off textured surfaces.
So what a linear workflow means, is that you take those colour textures, and convert them back to linear space before rendering, then you gamma correct/tonemap the final result back to gamma space (for viewing on a monitor). Now the lighting calculations work accurately, however it does change things – because the textures get darkened in the midtones the image can look darker, so you need to change the lighting setup, etc. etc. Hence, workflow – it’s something you need to have on all throughout the process, not just applying gamma at the end.
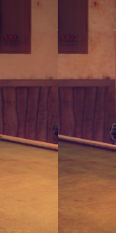
 I wrote some code a little while ago that did it all automatically in the shading process, applying inverse gamma correction for colour textures before rendering, then corrected back to gamma 2.2 afterwards. After adjusting lights from old scenes to have the same appearance, it gave some nice results. It seemed to bring out a lot more detail in the textures, which got washed out before (left is normal, right is with linear workflow). It’s not finished though, it also needs to adjust the lights in the preview render, and inverse gamma correct colour swatches too so the flat colours you pick in the UI are also linear.
Further references:
Great info! I’m looking into making a linear workflow. Your script sounds very nice. Sounds like it could make it easier for those who have gamma 2.2 images as textures, and don’t want to spend the time to convert them in Photoshop. Are you planning on sharing the script? 🙂
Thanks!
Great post! As usually!
You make things look so easy. 🙂
Thank you very much